Using the Prospects Metric
The Prospects metric can be used to see various information about prospective members, such as the length of time it took former prospects to join the club, and the number of prospects by campaign or lead priority.
Setting up the Prospects metric:
- Click Member in the Display Items section of the Sidebar Menu.
- Drag and drop Prospects onto the Dashboard.
- Hover the cursor over the Prospects metric title to display the drop-down menu.
- Click Configure Options.
- Select the clubs you wish to view by moving them from Available to Selected using the multi-select list. See Multi-Select List.
- If you want to display the Club number column, set Combine Clubs to No. Otherwise, select Yes.
Note: You may prefer to combine clubs in order to make this metric easier to view, especially if you are using the tiled view and displaying more than five columns. - Select the Issued Date. The issued date is the day the prospect was entered in Fast Add (The issue date is set in the Dates submenu of Fast Add:Prospect)
- Select a View. See Prospect Metric Views.
- Select whether to display only prospects converted to members, only non-converted prospects, or both (All).
- Select the department you want to select employees from or select All to view all employees.
- Select an employee or select All to view all employees.
If you selected all departments, Employee will also be fixed to All. - Select the columns you want to display using the multi-select list. See Multi-Select List.
- Click OK.
Tip: If you choose more than three columns to display, you may prefer to maximize the Prospects metric for easier viewing.
Accessing Prospects information:
- If a large number of prospects displays, you may want to sort by one column (such as Converted Count or Prospect Count) for easier viewing. See Sorting Columns.
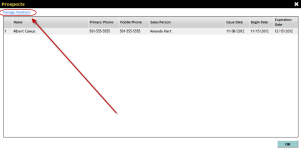
- Click the number displayed in the Converted Count or Prospect Count column to open a pop-up list with the following columns:
The first column numbers the listed prospects alphabetically by first name.
- Name
- Primary Phone
- Mobile Phone
- Sales Person
- Issue Date
- Begin Date
- Expiration Date
- Click Manage Members in the top left corner of this pop-up to open these members in the Manage Members page.
Click Close to return to the Dashboard.
- Click OK to close this pop-up.
Changing the Prospects Metric Display:
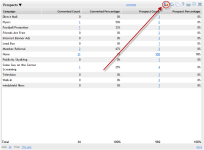
This metric by default displays as a table. However, you can also view it as a pie chart, line graph, or bar graph by clicking the display button on the metric toolbar and cycling through the four different displays.
More Tips for Using the Prospects Metric
To determine your most successful campaign or sales person:
- Select Campaign or Sales Person as the View in the Options menu.
- Set Converted to All in the Options menu.
- Click the Converted Count header to sort the data in descending order (down-facing arrow).
- The most successful Campaign or Sales Person will be at the top of the list.
See: Prospects Metric for more information.
 © 2024 ABC Fitness Solutions, LLC.
