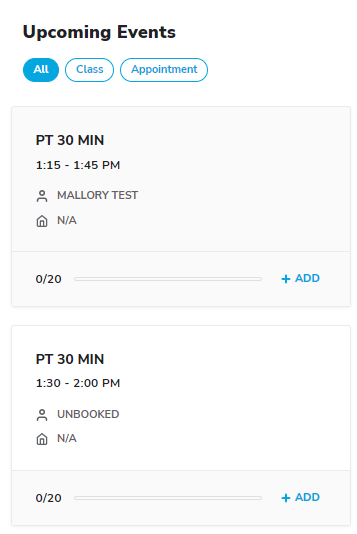
Club Home
You can configure this page by navigating to the Club Home settings page (Settings>Club Home).
The Club Home page provides a quick overview of the club and provides quick access to POS, event enrollment, and member details.
By default, the completely new Club Home screen will open when you log in. This serves as a welcome page that shows the following panels:
The Club Check In Pane will be present on the Club Home screen, and on all other screens.
To enable the Club Check In Pane, navigate to Settings>Settings>Workstation. In the General section, set Enable Check In widget to Yes, and click Save.
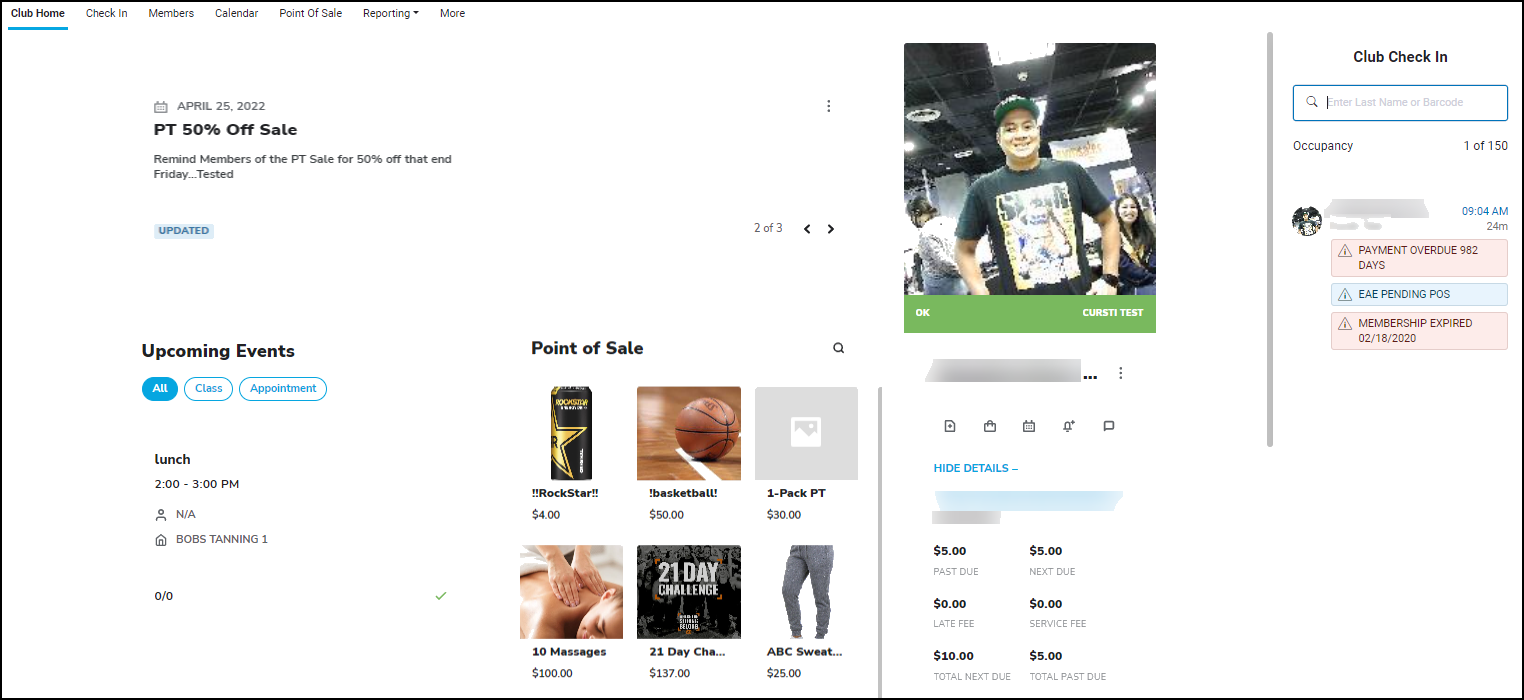
You must have a security role that allows access to each part of the Club Home screen to view it. To view the Club Home security role clearance for the logged-in user, navigate to Menu>Employees>Security Roles>Security Role>Ignite All Access>Club Home. The security role only has access to the items marked Yes. 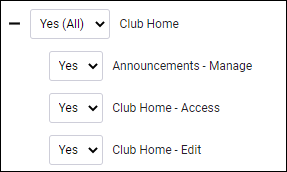
Club Announcements
The Club Announcements tile shows today's date and the announcements for the day. Click the bottom right arrow to cycle through announcements.
These announcements will cycle automatically every five seconds.
The label "New" will appear for 24 hours after the creation of an announcement. New announcements will be displayed first.
If an announcement is updated more than 24 hours after it was created, the label "Updated' will appear for the next 24 hours. Updated announcements are shown following new announcements, but before announcements that are neither new nor updated.
A security role has been added to restrict the creation, deletion, and editing of announcements. This security role can be found here: Settings>Employees>Security Roles>[security role]>Club Home>Announcements - Manage.
Viewing announcements is available to all users by default.
To create a new announcement:
- Click the
 kebab icon.
 - Select Add Announcement.
- Enter a Title, Expiration Date, and Message for the announcement.
- Click Save.
To delete an announcement:
- Click the arrow until the announcement you want to delete is displayed.
- Click the kebab icon.
- Select Delete Announcement.
- Click Yes, Delete.
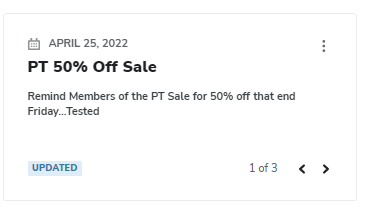
Upcoming Events
This panel lists the next upcoming events at the club. Each event tile shows the event name, scheduled time, employee, location, and number of members scheduled to attend.
Upcoming Events can be filtered by Classes, Appointments, or All. By default, both classes and appointments (All) are displayed.

If the event is not at maximum capacity, a member can be added.
To add a member to the event:
- Click Add.
- Search for the member.
- Click Select next to the member name.
The member will be added to the event.
To edit the event, click the event tile. The Edit Event dialog will open.
In the Edit Event dialog, you can do the following:
- Change the Event Group by clicking the Event Group name.
- Add a member by clicking Manage.
- Remove a member from the event by clicking Remove.
- View the Member Summary by clicking the member's name.
- View Service Usage Details by clicking the service name.
- Change the Status of the event: Pending, Completed, Return to Pending Status, Cancel Event (charge), or Cancel Event (no charge).
- Edit the Comment, Employee(s), Location, Date/Time, Max Attendees, Status Reason, and Duration.
- View available, scheduled, and unscheduled events for each member in the event.
- Select an Opportunity Level and a Sold value of Yes or No.
- Print a PDF of the event information.
To view all events, scroll to the bottom of the page and click View All. The calendar will open.
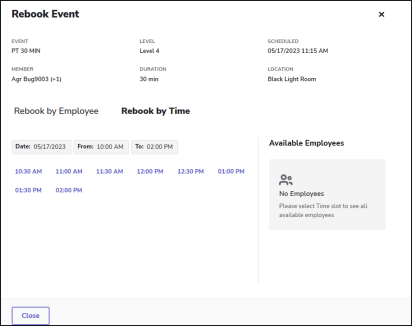
Rebook
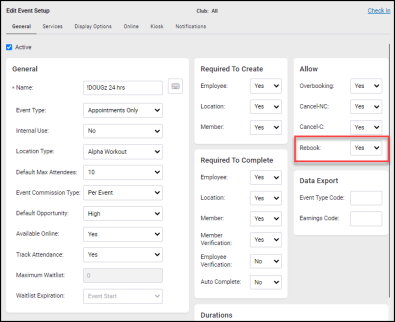
The Rebook button will appear for events on the Club Home page only if the Rebook option is set to Yes for the event. This option can be located by navigating to Settings>Schedule Setup>Configuration>event>General>Allow>Rebook. An example of this setting is shown below.
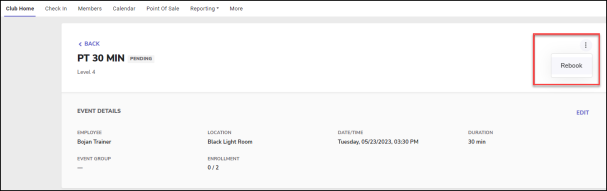
If Rebook is turned on for an event, the Rebook button will appear in the top right corner of the event when selected from the Upcoming Events pane of Club Home. An example is shown below.
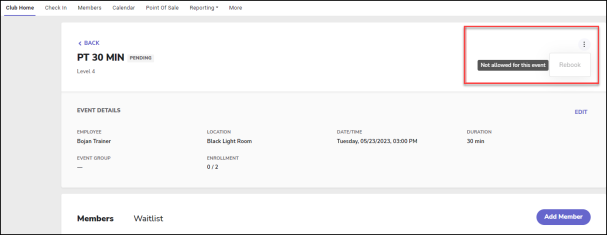
If Rebook is turned off for an event, the Rebook button will be inactivate (unclickable) and greyed out. An example is shown below.
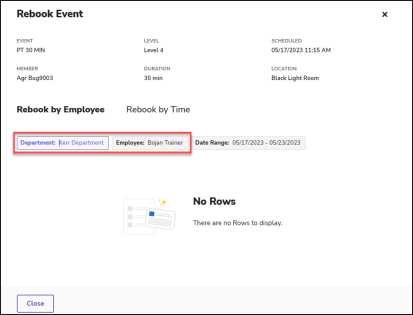
The Rebook Event page has two tabs, allowing you either to Rebook by Employee or Rebook by Time.
Rebook by Employee
The Rebook by Employee tab allows you to rebook the event with a different employee. Select the department to which the employee belongs, then select the new employee to lead the event. You can change the department without clearing the employee field.
The event will be rebooked with the new employee and all other former settings.
Rebook by Time
The Rebook by Time tab allows you to rebook the event at a different time. Select the date and time range in which to search, then select from the available time slots. When you click a time slots, the employees who are both available and eligible to lead the event will display to the right.
Point of Sale
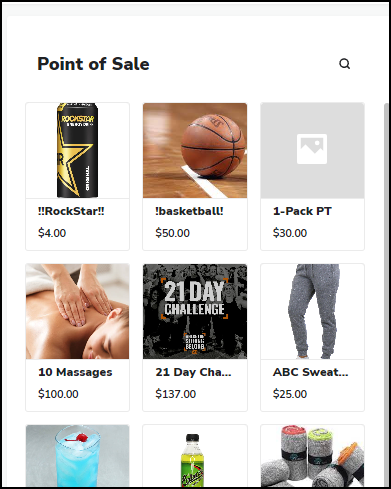
The Point of Sale panel provides easy access to frequently sold items. Each item tile shows the item name, image, and unit price.
Items will only be displayed in POS if they are set as Featured Items. To make an item featured, navigate to Settings>Inventory>Club Items, and select the item. On the Edit Club Items page, set Featured Item to Yes and click Save.
To add or update the image for a POS item, navigate to Settings > Inventory > Catalog Items, and select the item. On the Edit Catalog Items page, and click Select Image. Select the image from the gallery or upload a new image. Click OK, then click Save.
The image can be in .jpg, .jpeg, or .png format and is limited to 1 MB.
Click the search icon to expand the search field. You can search by UPC or item name.
Click an item to start a point of sale transaction. The POS module will open with the item added to be purchased, and the Find Member search will open so that you can attach a member to the sale.
Member Profile
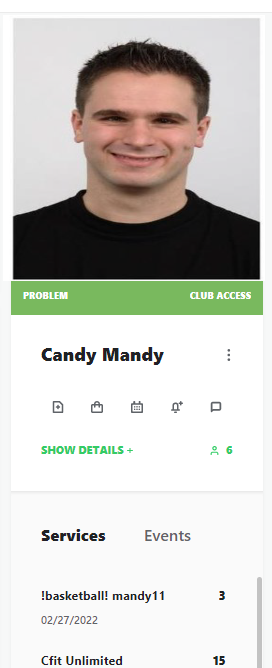
By default, the most recently checked-in member will appear in this panel. You can view the profile of other members by clicking a name listed in the checkin pane.
The member panel shows the member's photo, name, current status, barcode, agreement number, membership type, notes, and total number of members attached to the primary agreement. To display additional fields such as last sync date or locker number, navigate to Settings > Club Home > Member Profile.
Summaries of the member's payment amounts, purchased services, and scheduled events are also displayed.
Only events scheduled at the club the member has checked into will be displayed here.
Click Show Details to show more information on this member.
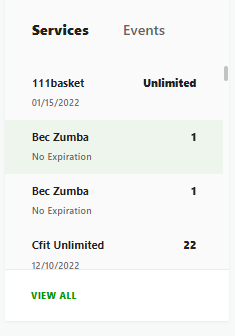
Below the member's billing information, purchased services and events are listed. If the Track Attendance setting is turned on (Settings > Schedule Setup > Configuration > event > Track Attendance > Yes), the text "Attended" or "Did Not Attend" will appear when the mouse hovers over a past event on the Events tab.
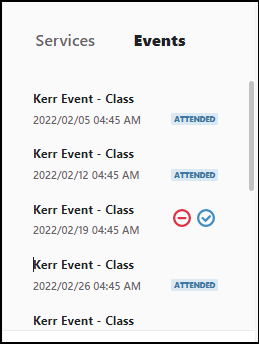
For events that do yet have an attendance status, use the Did Not Attend and Attended buttons to log attendance.
You can do the following in the member profile panel:
| Change barcode | Click the barcode, enter a new one, and click Update. |
| Check in secondary member(s) | Click the  secondary members icon, check the boxes next to the desired member(s), and click Check In. secondary members icon, check the boxes next to the desired member(s), and click Check In.The number in the icon indicates the number of secondary members attached to the agreement. |
| View secondary member | Click the secondary members icon, then click the  summary icon next to the member name. summary icon next to the member name. |
| View member details | Click the kebab icon |
| Enroll in an event | Click the Quick Enroll icon. |
| Start a POS transaction | Click the POS icon to start a POS transaction with this member. |
| View member events | Click the Calendar icon to view the calendar with the member selected. |
| Add a member alert | Click the Create Alert icon. |
| Add or view member notes | Click the Notes icon. |
| Deduct a service | In the Services tab, click a service to open the Deduct Service dialog. |
| View events | Change the selected tab from Services to Events. |
| View all events | Click View All to open the Events tab on the member details page. |