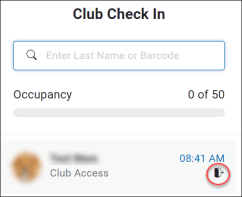
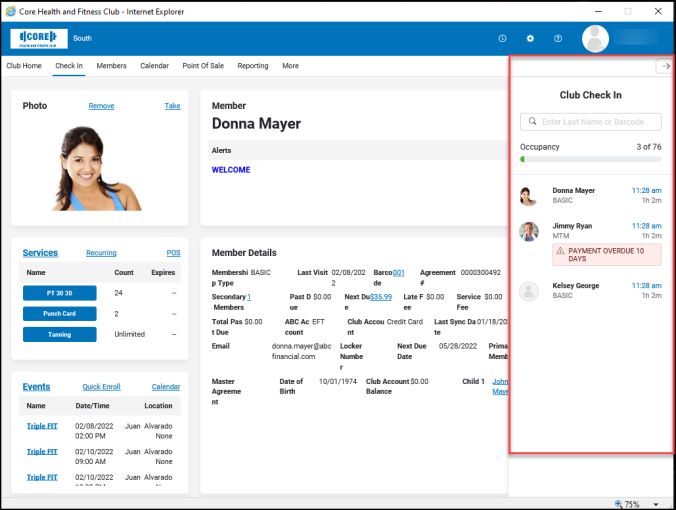
Club Check In Pane
The Club Check In Pane is a constant on every page. The pane includes the barcode entry field for checking in, an Occupancy meter, and the most recently checked in members with their checkin time, check in duration, membership type, and any associated alerts.
To enable the Club Check In Pane, navigate to Settings>Settings>Workstation. In the General section, set Enable Check In widget to Yes, and click Save. You will have to log out and log back in for the pane to display.
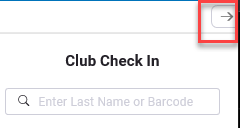
To collapse or expand the Club Check In Pane, click the arrow at the top right. This arrow will not appear if the browser window is maximized.
To enable or disable the Occupancy counter, navigate to Settings>Settings>Club>club>Main>Check In>Manage Occupancy Control.
A member's photo in the Club Check In Pane can be expanded by clicking it.
"Remote" will appear under the member's photo to indicate a remote check in.
The checked in member's photo, services, and events are listed on the left side of the check in screen.
Check In
To check in a member, enter the member's barcode or partial or complete name in the search field. 
If the name or barcode matches that of a member, that member will be logged in.
If the entry requires more information (for example, if you entered "smith" and multiple members are named Smith), the Find Member dialog box will open. Click Check In on this page to check the member in.
In some cases, the alerts attached to a member may prompt the Deny Entry / Allow Entry prompt with the alerts listed. From here, you may decide whether to allow the member to check in. An example is shown below.
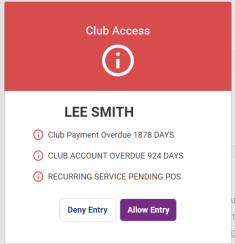
If you click Deny Entry, the photo of the denied member will appear in the Club Check In Pane encircled in red.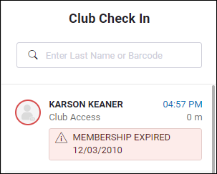
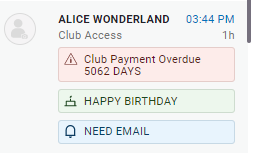
When you check in a member, they will be listed at the top of the Club Check In pane.
Alerts
Member alerts will be listed under the member name in the Club Check In pane and under the name of the checked in member.
The colors of the various alerts can be customized by navigating to More>Check In>Alerts.
Click a Pending POS alert to view the pending transaction. Click the pending amount to open and complete the transaction on the Point of Sale page.
Click Create Alert next to the checked in member's name to the left of the Club Check In pane to create a new alert for this member.
See Alerts for more information.